
Some brands are synonymous with a certain type of product. For facial tissues, there’s Kleenex. For action cameras, there’s GoPro. But if you look under the surface, even the fields that are seemingly dominated by one brand have plenty of competition, with the lesser-known companies sometimes packing extra features in an effort to stand out. For instance, take Insta360’s 360-degree action cameras, which can shoot all the way around you in a way GoPros can’t.
The company’s latest camera—the Insta360 X5—represents an incremental upgrade from last year’s X4, and to its credit, it does indeed offer the best spherical video footage from any camera I’ve tested. But despite adding AI here and there, it doesn’t really solve the problem that keeps most people away from these cameras: The footage is still a pain to deal with.
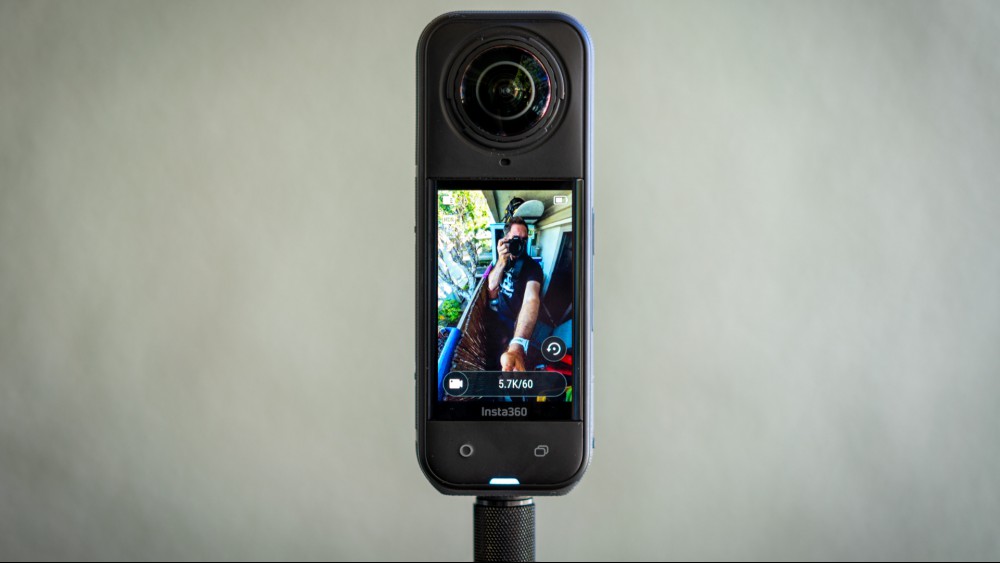
Let’s start with the basics. The X5 has the same basic shape as the X4, which is to say it’s an elongated brick with a camera lens on each side, and a large screen occupying most of one side. It comes in at 4.9 inches long by 1.8 inches wide by 1.5 inches thick, and weighs 7.1 ounces installed. It’s hefty, and you’ll really feel it in your neck if it’s attached to your helmet, or in your wrist if it’s at the end of a long selfie-stick. Like the X4, the X5 can shoot 8K30 spherical video (though calling a 7680x3840 resolution “8K” is a stretch in my book, especially because there’s overlap between the two lenses, which shouldn’t be counted twice), but you are able to pop out a flat 4K or 1080p image from that footage if needed. And if you’re shooting completely in 2D, it can also shoot 5.7K footage at 60 fps.
What’s new
Let’s start off with the X5’s new features, some of which are quite nice. For starters, the image sensors are now 1/1.28-inches, up from a half-inch on the previous model, so more light can get into them. That, combined with the new “PureVideo” mode (more on that later), make the X5 a whole lot better in low-light than any other 360-degree camera. It’s also got two new “Pro Imaging Chips,” in addition to the same 5nm AI Chip the X4 had, which boost its image processing power and enables features like 5.7K60 HDR and the 8K30 PureVideo mode. And, for folks without an external mic, there’s improved audio. The forward-facing mic (on the side without the display) has a built-in wind-screen this time around, which helps filter out annoying sounds while moving at speed, and voices come through clearer than before, which is something the vlogging set will appreciate. Plus, the camera is now waterproof to 49 feet (up from 33 feet), but considering you still need a dive-housing for underwater video in order to not screw up the stitching (where the two cameras’ footage is combined into one video file), that’s kind of a minimal bonus.
Arguably the biggest improvement here is to the lenses. Not only does Insta360 claim they are now made with a tougher, more scratch resistant glass, but at long last, they are finally user replaceable. Previously, if you scratched one of your lenses, you had to send it off to the company to be repaired, which could take months and cost hundreds of bucks. Now it’s just a $35 kit you can keep with you so you don’t have any downtime while shooting. While I didn’t test the kit, I did accidentally scrape one of the lenses against a very abrasive rock wall in Utah, and the glass emerged unscathed.
As for the shooting experience, the camera can also now shoot HDR video at 5.7K60 (previously it was limited to 5.7K30), and it can shoot a multi-exposure 72MP HDR still photo (meaning the camera takes multiple photos at different exposure levels, and then blends them together to bring up detail in the shadows while preventing highlights from blowing out). Note, though, that the process for those photos takes nearly a full minute.
There’s also a new shooting mode called InstaFrame, which allows you to select yourself and have the camera spit out a (theoretically) ready-to-use 1080p portrait-oriented video that keeps you in frame the whole time. Battery time has been extended to up to 180 minutes (up from 130), too, though you’ll have to use some of the less-taxing modes to get there. And while Insta360 claims the battery will now charge to 80-percent in just 20 minutes, despite using some very beefy USB-C chargers, it still took me closer to 60 minutes to hit 80-percent every time I tried to quick charge myself.
Using the Insta360 X5
The best part of using a 360-degree camera is that the framing is pretty much taken care of for you. As long as you can see the camera, it can see you. Put it on a selfie-stick and you get a close-flying drone effect (the camera automatically stitches out the stick), which is a look that still really stands out. You can also pan, tilt, zoom in and out in the edit, which gives you a ton of flexibility in how your shots turn out. It just looks so much better than a simple phone or single-lens action camera on a stick.
That said, this thing weighs nearly half a pound. That’s weight you can feel. Put it on an extended mount and leverage really works against you. Plus, while it’s nice to be able to just hit record and go, actually hitting record is also harder than it should be. The start/stop button isn’t very prominent (you’d never find it blind if you have a snow glove on), and the start/stop recording sound it makes is far too quiet to hear above much ambient noise. I also find Insta360’s menu system to not be particularly intuitive, so unless you’ve memorized all the camera’s modes, it’s not always obvious which mode does what.
And, of course, capturing footage is only part of the battle. The X5 shoots equirectangular video files in the .lrv and .insv formats, which are only playable via Insta360’s mobile app, desktop app, or a plugin for Adobe Premiere. Insta360 seems to push you toward using the mobile app, as it’s by far the easiest way to work with the footage (but boy is that a low bar to clear). But even using the app, some menu items would still appear in Chinese for me, even though I selected English as my language. I also found that nearly every time I opened the app, I was prompted to first delete things off my phone to clear storage space. It didn’t happen every time, but it seems to prefer that you have at least ten gigabytes of space available. That said, I was still able to use the app when I ignored the warning.
Once you’re through the warning, you pair the camera to your phone via the app, where you can then search through your clips and make some simple edits. That’s also where you reframe the POV, which you can do in a few ways. The most straightforward method is dragging/pinching/zooming your fingers around the screen and setting keyframes. That means you set specific points in the video timeline based on something like a filmed object’s size or position, and the app will then figure out how to transition smoothly between your set points when you play your video back. It makes sense in theory, but I found that it often gave me jerky transitions.

The method that worked best for me was to use the Record feature, where you stand, hit record, and then pan around your 360-degree footage with your phone, like it’s a sort of viewfinder, while pinching and zooming how your video should look with your fingers. That’s how I created the little ditty below, though it took five or six takes before I felt like I nailed the choreography.
On the plus side, I’m really happy with that video. In fact, I’m really happy with a lot of the videos I was able to generate during my testing. It’s just a bit of a process to get them to the point where I feel confident posting them.
The app has a couple features that attempt to make that process easier, but don’t get too excited. The first one is a Tracking mode that allows you to select a subject (typically yourself), and the camera angle will then automatically tilt and pan to keep you centered. It doesn’t work all that well, though. While I had the video centered on me, it turned out weirdly shaky and hard to watch. It was like it was trying so hard to keep me centered that smoothness went out the window, so it looked very unnatural. There’s also an AI powered “Auto Edit” feature, and frankly, the less said about it, the better. You can ask it to make a video out of one clip or a combination of clips, but when I tried it, all of the results were pretty much unwatchable, selecting random angles and segments, then cutting them to bad royalty-free music.
If the mobile app isn’t your speed, there is the desktop app, but it’s more limited. I found it was the best to view my footage (after importing it all to a hard drive), but actually editing with it is pretty annoying. Any time you want to adjust your footage’s perspective, you have to set keyframes, and it’s once again tricky to get transitions to be smooth. Once you go to export your creations, you’ll also find that you can’t really create your own presets, either. It’s just a bit frustrating.
More frustrating, though, is the Adobe Premiere plug-in. While I’m glad it exists, footage is incredibly cumbersome to view and edit while using it. The only way you can pan around is by adding your clips to a timeline, applying the Insta360 plug-in, and then going into the Effects Controls window and using sliders to look around. And because the files start out as these big, warped images that encapsulate everything, it’s very difficult to tell if you’re even looking at the right clip before you go through all that trouble, so it’s just a massive waste of time. While GoPro has fallen way behind in the 360-degree camera game, at least its Premiere plug-in—which was released in 2018!—allows you to click on the image to tilt/pan/rotate/zoom, and the plug-in can even automatically add keyframes as you go. So, the desktop workflow I ended up using was to import the clips using the Insta360 desktop app, make all of my edits (angles, etc) within each individual clip inside that app, then export them, import those exports into Premiere, and edit together a sequence from there. Not ideal!
It's worth mentioning that one of the new features on the camera is designed to eliminate these problems for you. With InstaFrame, you select a subject (e.g. you) on the camera’s screen and just hit record. It’s kind of like the Tracking mode the mobile app gives you while editing, but you can start it up before shooting. While active, in addition to the typical 360-degree files, the camera will also save a standard .mp4 file (1080p30, portrait) with your subject in the center no matter where your selfie-stick moved during filming. It’s a good idea in theory, but in practice I found that it suffered from a lot of the same shakiness as the app’s Tracking mode, and you can’t control the zoom or anything after the fact, nor adjust any of the other parameters.
The video quality
My overall impression is that the footage this thing produces is really nice. While I didn’t test the X4 personally, I’ve seen enough footage from it to say that colors on the X5 are vastly improved. The sky is bluer, grass is greener, and skin tones are more natural. But while stitch-lines (i.e. the place where the image from the two separate lenses intersect) are certainly improved from early generations, they still create an annoying ripple in the middle of your shots from time to time. Interestingly, it’s usually good about putting the horizon line where it should be, but sometimes it just totally biffs it and the horizon is inexplicably at a 15-degree slope, which you then have to manually correct. Stabilization is quite good, though, especially in bright lighting.
In terms of shooting 8K vs 5.7K, I was honestly prepared to write 8K off as a gimmick and waste of memory card space, but the 8K footage is noticeably sharper. This is especially true if you want your final edit to be in 4K, but even at 1080p, the detail in the footage that started at 8K is clearly better. The footage is more flexible, too, so you can push in further before the pixels start falling apart. That said, at 8K, you’re limited to shooting at 30fps, while 5.7K can go to 60 fps, so which resolution you’ll want to use really depends on what you’re shooting. If you’re filming some fast-moving action that you might want to reduce to half-speed slo-mo, then 5.7K60 is clearly the mode you’ll want. If you’re vlogging, or shooting some pretty botanical garden or something, then I’d stick to 8K, where the details will pop. That said, if you’re just shooting for a mobile platform like Instagram or TikTok, the compression on your footage will be so great that the difference will be negligible. In that case, it’s probably for the best to lower your resolution, to save storage space.
If you do shoot at 5.7K, do yourself a favor and turn HDR off! It’s on by default, and it really shouldn’t be, because it’s garbage. HDR introduced a lot of very noticeable noise to my shots, especially in the shadows, and the details got a lot mushier. The sky ends up being slightly bluer, but other colors get so much worse. I found that some very pretty sunset colors got completely flattened and looked terrible when I used HDR while shooting them. What you gain in no way makes up for what you lose. I’d only use HDR in instances where I’m backlit by an ultra-bright sun, and even then, I’d be iffy on it. It also introduced a more prominent moiré effect, which isn’t good.
In better news, PureVideo mode is a significant improvement when shooting in low-light. I’m sure the larger image sensors help here, but I think the heavy lifting is done by the mode cranking up the ISO and applying some aggressive de-noising filters in camera. It’s not perfect—you do lose a lot of sharpness in this mode, and everything has a sort of unnatural smoothness to it, like an Instagram skin filter. That said, it can make the difference between footage being usable and unusable, so if you shoot at dusk a lot, this feature is a big deal, and it works in 8K and 5.7K modes, too (though it’s limited to 30fps).
One thing video nerds will be sad about is that there’s still no 10-bit LOG mode. That would allow for maximum flexibility over colors and lighting while editing in Premiere. Considering how annoying editing this thing’s footage in Premiere is, it’s not something that I personally missed, but no doubt there are some professional videographers out there who were hoping that this would finally be included. 10-bit video means way more color information is being captured, so you really have a ton of control over how the video edit looks.
Should you get an Insta360 X5?
While 360-degree action cameras still have plenty of room for improvement as a whole, the Insta360 X5 is currently the best one you can get. If you already have an X4, there’s not a whole lot of reason to upgrade unless you plan to do a lot of low-light shooting, but if you’re getting into 360-degree footage for the first time, there’s a lot to like here.
That said, I don’t think a 360-degree cam benefits much from having such a large screen, so I’d rather effort be put into making the next generation smaller and lighter. At $550, the X5 is also a bit pricey, so a lot of people might be better off with a regular 2D action camera like a GoPro Hero13 or DJI Osmo Action 5. They’re cheaper, and while you would lose the ability to manipulate the perspective after the fact like you can with a 360-degree camera (and your selfie-stick won’t get cropped out), the image quality will be far better and 2D footage is infinitely easier to sort through/work with/share.
That said, there’s something to be said for how flexible the X5’s footage is, especially when you’re deep in an action sport and can’t worry about framing. The AI-assisted solutions for editing your footage still range from bad to awful, but those moments where you nail it really can produce something pretty special.
Brent Rose is a journalist, producer, host, and photographer based out of Los Angeles (after 5+ years of vanlife around the U.S. and Canada). He covers a wide range of consumer tech, travel and adventure, health and fitness, environmental and social justice, NASA, and whatever else piques his curiosity.